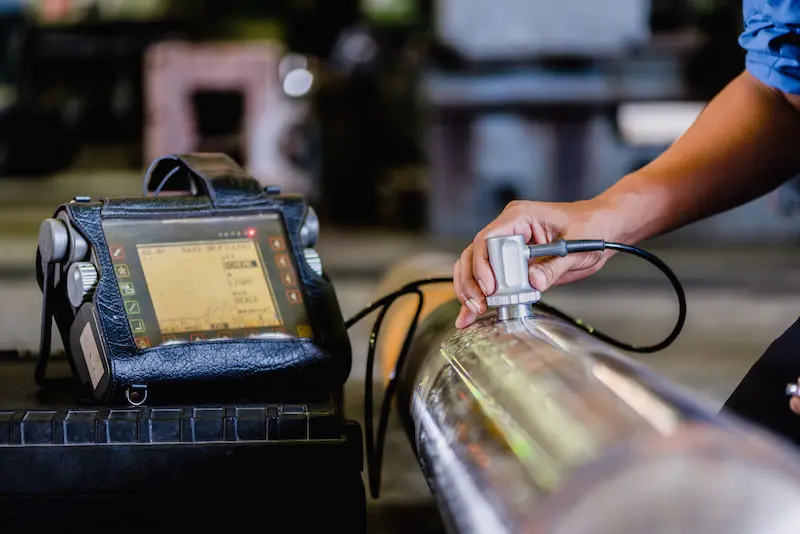
Aerospace Nondestructive Testing (NDT) Services
At Valence, we take care in ensuring your parts are flawless. We offer a range of inspection services, including NDT as a standalone service, as well as all pre- and post-NDT finishing services.
With multiple in house level 3 certified technicians, we expertly process everything from small parts to large structural parts up to 30’. Our technicians complete exceptional training and exceed standards throughout the entire production process.
AS9100 Nadcap Approved NDT
We offer extensive maintenance and fracture critical approvals for all major primes, including Boeing, Airbus, and many more. We hold AS9100 Nadcap approval as well as unique approvals for NASA, United Launch Alliance, and many more.
At Valence, we understand the importance of meeting industry requirements. We are committed to quality assurance in all of the products we produce. Ask us about our on-location NDT services, including FPI and eddy current!
Nondestructive Testing Services
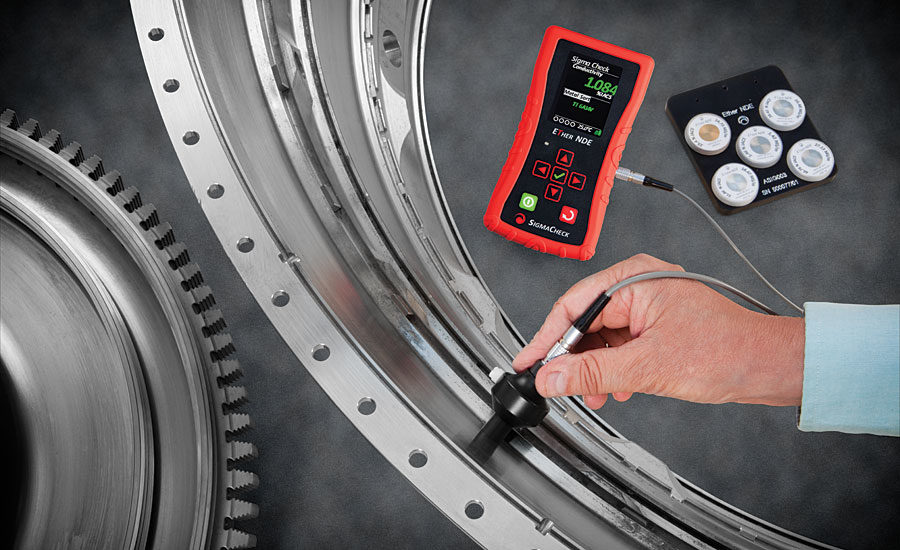
Conductivity Inspection
Conductivity inspection measures the electrical conductivity of a metal part or component. This is an in process test of chemical processing to verify the integrity and consistency of a chemical processing operation.
Hardness Testing
Hardness testing verifies the hardness of the base material, and can be used to validate that previous processes have been performed correctly. All Valence products are guaranteed to meet specified standards.
FPI (Fluorescent or Liquid Penetrant Inspection)
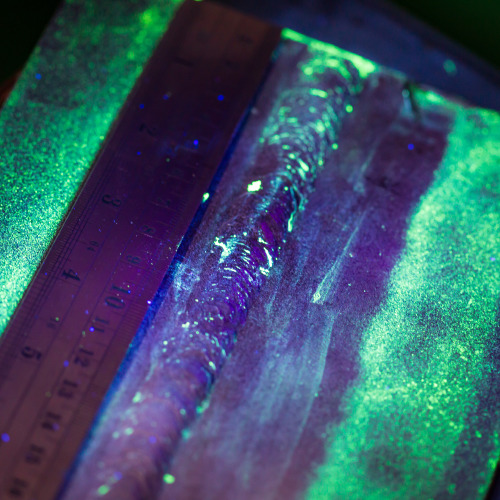
Fluorescent penetrant inspection is a type of dye penetrant inspection where a non-permanent fluorescent dye is applied to a non-porous part to detect cracks and defects that are invisible on sight inspection. This type of inspection is a highly efficient method to testing parts.
Magnetic Particle Inspection
Magnetic particle inspection detects surface and shallow subsurface discontinuities in ferromagnetic materials. This inspection can give immediate data and reveal errors or defects. It will prevent future leaks and other flaws.
Eddy Current Testing
Eddy current inspection uses electromagnetic induction to find and characterize surface and sub-surface defects in conductive materials. It is a highly sensitive form of testing for small surface defects, providing immediate results.
Copper Sulfate Testing
Copper sulfate testing verifies the effectiveness of, or need for passivation on a stainless steel part. This test is proficient in advanced aerospace applications.
Boroscope Inspection
Boroscope inspection allows the internal surfaces of geometrically complex components to be visually inspected for surface finish integrity. The inspection can prevent small issues in materials that potentially lead to huge losses in the long-term.
Valence performs all of these services to the highest degree of care, with approvals for most prime and military specifications. Our products and services significantly enhance safety, long-term use, and consistency in the aerospace industry. View our specs here.
NDT Capability Sizes
| Valence Eastman | L | Valence Wichita | L | Valence Grove | L | Valence Garden Grove | L | Valence Los Angeles | L | Valence Seattle | L | Valence Everett | L |
|---|---|---|---|---|---|---|---|---|---|---|---|---|---|
| Eddy Current | No Limit | Hardness/Conductivity | No limit | Hardness/Conductivity | No limit | Abrasive Blast | 5' | Hardness/Conductivity | No limit | Hardness/Conductivity | No limit | Hardness/Conductivity | No limit |
| Hardness/Conductivity | No limit | Magnetic Particle Big | 6' | Penetrant | 24' | Glass Bead | 3' | Penetrant | 27' | Magnetic Particle | 4.5' | Penetrant | 30' |
| Magnetic Particle | 4.5' | Penetrant | 13' | Laser Part Mark | 4' | Penetrant | 6' | ||||||
| Penetrant | 20' | Stress Relieve Bake | 3' | ||||||||||
| Ultra Sonic Cleaning | 4' |
Eddy Current Testing
Equipment maintenance includes testing as a necessary step. Assessing the components, design, structure, and raw materials of your assets and products is crucial. The procedures can be categorized as destructive testing or nondestructive testing, depending on the condition of the tested component after the testing is complete.
Destructive testing is a testing technique used when a component is damaged or destroyed during the testing process. Nondestructive testing, in contrast, is performed without harming the equipment being tested.
While there are several methods of nondestructive testing, we will focus on eddy current testing. We will discuss how it works, the advantages and disadvantages of this method of testing, the materials that can be tested using this method, and the standards for this method of testing.
Before we delve into what eddy current testing is all about, it is important that we have a clear definition of what nondestructive testing is.
What Is Nondestructive Testing?
Nondestructive testing (NDT) is the process of looking for flaws or discontinuities in a material, component, or assembly without damaging the part’s or system’s ability to function normally. In other words, the part can still be used after the inspection or test is finished.
Other tests, as opposed to NDT, are destructive in nature and are carried out on a small number of samples (“lot sampling”) rather than on the materials, components, or assemblies that will actually be used.
These destructive tests are frequently used to assess the material’s physical characteristics, such as impact resistance, ductility, yield, ultimate tensile strength, fracture toughness, and fatigue strength, but NDT is more efficient at identifying discontinuities and variations in the material’s properties.
Modern nondestructive tests are now used in manufacturing, fabrication, and in-service inspections to guarantee product dependability and integrity, regulate production procedures, cut costs, and maintain a constant level of quality. In-service NDT inspections are used to make sure that the products being used continue to have the integrity required to ensure their usefulness and the safety of the general public. NDT is used during construction to ensure the quality of materials and joining processes during the fabrication and erection phases.
Difference Between Nondestructive And Destructive Testing
Although the goals of destructive and non-destructive testing are somewhat similar, the fundamental use cases and application techniques differ significantly. We will contrast and compare them in this section based on a few key elements:
Purpose
Each type of testing is done in order to guarantee the safety of the product. But in destructive testing, tests like fatigue and tensile tests are used to determine a product’s operational limits.
NDT, on the other hand, allows us to determine whether a manufactured item or one already in use is adequate to perform satisfactorily in its service environment. Using an ultrasonic thickness measurement for ship steel plating, for example, we could use it to determine the degree of wear and tear.
Time
NDT is once again more effective with regard to timing. By their very nature, destructive methods take a lot longer to complete. This is primarily due to the fact that destructive testing processes are typically manual, and we can only automate a small portion of it. Additionally, they demand more time for preparation and inspection.
On the other hand, NDT doesn’t even always require that parts be taken out of service, which saves valuable time. Destructive testing necessitates stopping operations and equipment, which lengthens downtime.
Cost Efficiency
Nondestructive testing is more economical than destructive testing in two different ways.
First off, the test specimen is not harmed. It will still be just as effective after being examined using NDT and can be used right away.
Second, NDT can spot potential problems in operating machinery, like pressure vessels, and suggest replacement before a failure occurs, preventing breakdown costs that are significantly more expensive than brief planned downtime for a single part replacement.
Wastage
When a test product is put through destructive testing, it can no longer be repaired. Sometimes it’s necessary to throw away entire machines.
Tensile tests, 3-point bend tests, impact tests, and drop tests are a few instances of destructive techniques that result in waste.
Nondestructive testing is not like this. In some circumstances, destruction might be required, but in many others, nondestructive techniques will produce results that are at least as good.
Safety
Before a product is put into use, destructive testing is done to ascertain its operational limits. Although destructive testing cannot be used on products that are in use, it may be necessary for some products, such as PPE, where they must be manufactured in accordance with certain standards.
In these situations, NDT techniques can assist us in locating worn-out components and products so that we can replace them. By ensuring that critical equipment is well within desired limits, the number of safety incidents can be brought to a minimum.
Now that we know what nondestructive testing is and how it differs from destructive testing, let us proceed to discuss eddy current testing, which is a method of nondestructive testing.
What Is Eddy Current Testing?
Eddy current analyzes specific material properties, such as thickness measurement, material identification, and heat treatment conditions, using the electromagnetic induction principle to detect corrosion, defects, and cracks hidden beneath a material’s surface.
Only conductive materials like steel, aluminum, and copper can be used with EC.
An alternating electrical current created by an eddy current probe passes through a wire coil to create an oscillating magnetic field.
A near-surface crack, corrosion, or changes in the material’s properties will interrupt or alter the eddy current, which is produced when the coil is in close proximity to the object or area being investigated.
A trained operator can determine the precise nature of the issue by using the EC instrument, which tracks the outputs from the probe and then displays and plots the changes.
Smaller areas are tested with a single eddy current probe, while larger areas are tested with multiple probes in eddy current array systems.
To optimize test performance and guarantee accurate results, probe selection is crucial, and choosing the best probe for each application is essential.
Even though EC is useful for checking all metals for flaws, the conductivity and permeability of the metals will affect how deeply the eddy currents penetrate.
This quick, efficient, trustworthy, and accurate testing method is used by a wide range of industries, including engineering, aerospace, nuclear, power, chemical, petrochemical, and energy, to evaluate their structures, processes, and products for flaws in order to maintain ongoing safety, quality, and optimal asset management.
It’s a crucial technique for determining whether a material’s conductivity has been affected by exposure to extreme heat as well as for assessing the strength of welds in situations where metal structures have been subjected to significant loading.
How Does Eddy Current Testing Work?
The method is dependent on electromagnetic induction, a property of the material. An alternating magnetic field forms around a conductor, such as a copper coil, when an alternating current is passed through it. The field changes size as the alternating current rises and falls. The fluctuating magnetic field surrounding the coil permeates the material and, by Lenz’s Law, induces an eddy current to flow in the conductor if the coil is then brought close to another electrical conductor.
In turn, this eddy current creates a magnetic field of its own. The current and voltage flowing in the coil are impacted by this “secondary” magnetic field, which is in opposition to the “primary” magnetic field.
The size of the eddy current will be impacted by any modifications in the conductivity of the material being studied, such as near-surface flaws or variations in thickness. The foundation of the eddy current testing inspection technique is the detection of this change using either the primary coil or the secondary detector coil.
A material’s permeability determines how easily it can be magnetized. The depth of penetration decreases as permeability increases. Ferritic steels have a magnetic permeability that is hundreds of times higher than non-magnetic metals like austenitic stainless steels, aluminum, and copper.
At the surface, eddy current density is higher and defect sensitivity is highest; these characteristics decrease as depth increases. The metal’s “permeability” and “conductivity” affect how quickly the value decreases. The depth of penetration is influenced by the material’s conductivity. High-conductivity metals have greater eddy current flow at the surface, while metals like copper and aluminum have less penetration.
The alternation current’s frequency can be changed to control the depth of penetration; the lower the frequency, the deeper the penetration. As a result, deep defects can be detected using low frequencies, while near-surface defects can be found using high frequencies.
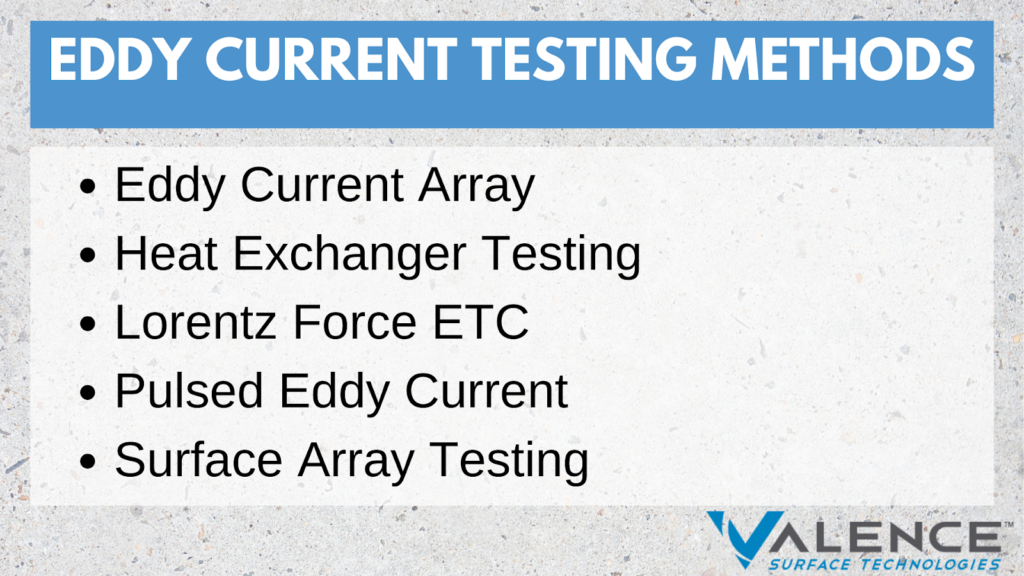
Different Eddy Current Testing Methods
The different eddy current testing methods are as follows:
Eddy Current Array
In an assembly called an Eddy Current Array (ECA), several EC coils are arranged side by side. For full area coverage during conventional eddy current testing, the probe is rastered, which may cause it to miss some areas. Users can inspect a larger coverage area more quickly with ECA’s overlapping/multi-coil design (normally about 32 times the coil coverage).
The strength of the signal generated by each coil in the probe depends on the phase and amplitude of the object it is placed over. It is possible to measure this signal and record the data. A C-scan image that visually represents this data by referencing it to an encoded position and time is then possible.
The majority of other eddy current methods’ flaw detection strategies can be accurately replicated by eddy current array. However, this approach has a number of noteworthy benefits, including:
Heat Exchanger Testing
One of the most widely used applications of eddy currents is for heat exchanger testing.
In this kind of testing, inspectors use eddy currents to detect flaws in metal tubes and provide instantaneous data after just one pass with the probes.
Lorentz Force ETC
A more recent NDT technique called Lorentz force eddy current testing employs multiple DC magnets to try to overcome the skin effect, which is the cancellation of a flow’s current in the conductor’s center and a corresponding reinforcement in the skin.
Inspectors can perform eddy current tests quickly and accurately by using the Lorentz force eddy-current testing method in addition to multiple magnets.
Pulsed Eddy Current
The operation of Pulsed Eddy Current (PEC) relies on the electromagnetic induction principle. A magnetic field forms around a conductor when step function voltage is applied to it. As the current alternates, this field’s intensity changes. A current will be induced in another conductor if it is brought close to the first field. The EC will distort if there are any flaws in this material. The first conductor in PEC is an EC probe, and the second is the test object.
The fact that pulsed eddy current has a continuum of frequencies is its main advantage over traditional EC. As a result, information from a variety of depths can be obtained simultaneously, and it is possible to measure the electromagnetic response to several different frequencies in a single step.
Pulsed eddy current is possible without making contact with the material’s surface. As a result, it may be helpful when an object’s surface is unattractive or rough. This technique also doesn’t need to remove any insulation or prepare the surface, which makes it a quick and inexpensive way to find corrosion.
Surface Array Testing
In the aerospace sector, surface array testing is frequently employed because it offers highly accurate measurements of conductivity and corrosion/wall thickness.
This kind of testing is very flexible and can locate flaws in challenging-to-inspect locations where other inspection techniques might fail.
Advantages And Limitations Of Eddy Current Array
Small flaws can be located using sophisticated software and detection probes during eddy current testing (ECT). Analysts can easily and accurately scan for anomalies on a surface and subsurface level, but ECT has its limitations, particularly when it comes to thorough inspections. Eddy current instruments, for example, can perform subsurface inspections but are limited in their ability to probe as deeply as UT instruments.
It’s important to weigh the benefits and drawbacks of eddy current technology to see if one side outweighs the other when assessing the viability of ECT in the context of a company’s current inspection requirements.
The Disadvantages Of ECT Technology
Despite being at the forefront of cutting-edge nondestructive testing, eddy current technology does not provide a comprehensive solution for all NDT requirements. The fact that ECT only uses current and cannot be used on non-conductive materials is one of its main drawbacks. Due to ECT equipment’s vulnerability to permeability changes on the welds, it is also non-conductive when used with ferromagnetic materials.
Additionally, since ECT current always flows parallel to the surface, flaws that are not directly in contact with it cannot be detected, allowing some potentially serious flaws to go completely unnoticed. To locate flaws at various angles and wave beam shapes in such circumstances, a more thorough inspection technique is required (such as phased array ultrasonic testing, or PAUT).
Additionally, ECT is not always capable of handling sizable areas, particularly those with complex geometries. Advanced tools and software can lessen these problems, but even the best software may not be able to help inspectors distinguish between geometry signals and flaw signals during data analysis. The permeability of the signal and the currents may further complicate data analysis, making it particularly challenging to distinguish between significant and trivial irregularities. This kind of interpretation calls for expertise and skill that are typically only found in seasoned analysts.
Other Limitations Of Eddy Current
- The only materials that can be tested using eddy currents are metallic ones.
- An important component is the instrument’s calibration.
- The equipment used for eddy current testing needs to be standardized.
- The instruments are really expensive because this testing is digital.
- Both the coil and the testing sample should have the same shape.
- The right size of the coil is necessary to maintain the instruments’ sensitivity.
Nevertheless, ECT has distinct advantages over other NDT options in some circumstances, despite these drawbacks.
Advantages Of Eddy Current Testing
When it comes to portability and flaw detection, ECT is one of the most flexible NDT testing methods. The equipment is easy to set up and does not use radiation or potentially dangerous chemicals. It is secure, reliable, and capable of identifying even flaws that are simple to overlook. Such flaws to consider include:
- Cracking
- Corrosion
- Erosion
- Material degradation
- Thickness loss
Choosing handheld eddy current instrumentation has additional advantages that can speed up testing and make it easier to use.
Additional Advantages Of Eddy Current Testing
- There is no need to couple media.
- Eddy current testing makes it possible to perform 100% evaluations.
- The potential for process monitoring may exist.
- It is possible to recognize intelligent filters and patterns.
- The automation’s potential is quite high.
- Recording and documenting the findings of the evaluation that was done.
- Improved test reproducibility.
- Excellent performance and speed during testing.
- Applications have a lot of flexibility.
- Capable of identifying the minor flaws.
Heat Exchanger Testing
ECT excels in the inspection of heat exchangers because eddy current instruments can find flaws in materials used for tubing, like carbon steel and magnetic alloys. When defects cause the current flow to be interrupted, this mechanism detects flaws. Multiplexed frequencies found in heat exchanger equipment support excellent detection performance. Additionally, the simultaneous injection features improve remote field testing while speeding up the testing process.
High-quality ECT probes also enable the analyst to obtain immediate data in a single pass, saving money and reducing the need for probe changes. There are bobbin and array-style heat exchanger probes as well as hybrid probes that combine bobbin and array features.
The array coils in the probe’s body enable analysts to detect circumferential flaws, including hidden flaws that, if missed, could result in expensive operational failure. It’s crucial to select probes with greater coverage per coil density for the best results because they increase the chance of discovering hidden degradations.
Additionally, ECT reduces inspection times, enabling analysts to exit risky testing areas more quickly. Although bobbin and array are prime combinations, surface array—a potent tactic that reads flaws in great detail—is the secret to truly effective ECT.
Surface Array Testing For Aerospace And More
Surface array instruments and probes can cut inspection time by up to 95% when compared to conventional pencil probing. With incredible accuracy, a surface array can measure wall thickness and conductivity as well as the conductivity of different alloys and metals, including aluminum. An internal or external structure’s corrosion or any other type of aberration that could erode the material can be identified using the wall thickness analysis.
Additionally, it is very adaptable and versatile, able to draw attention to difficult-to-reach areas that other NDT techniques are unable to thoroughly inspect. In the testing phase, it has some of the strongest signal qualities that can pick up more flaws, such as minor material losses. Managers can develop precise maintenance schedules that address flaws early with the aid of this detection boost.
Final Thoughts On Advantages And Limitations Of Eddy Current Testing
Eddy current testing is an essential component of any NDT strategy despite its shortcomings due to the benefits of ECT technology. Eddy current is one of the most efficient and effective tools in an NDT analyst’s toolbox due to its dependability, adaptability, and, most importantly, the high quality of data that can be obtained more quickly and easily than with clumsy and complex traditional NDT methods, such as liquid penetrant testing (LPT) and magnetic particle testing (MPT).
Quality is, of course, the key to maximizing the potential of any eddy current testing solution. The best data quality is ensured by providing analysts with cutting-edge equipment, adaptable probes, and cutting-edge software. This can even help to mitigate many of ECT’s common drawbacks. This will enable analysts to conduct more thorough and accurate tests, streamline inspection procedures even further, and identify flaws early enough to successfully stop them from turning into serious failures that could endanger time, money, or—in the worst cases—lives.
Types Of Applications In Eddy Current Testing
Types of applications include:
Material Sorting
Some useful tools for sorting hardened steels include ferrous segregators and electromagnetic sorting bridges. Conductivity meters can be used in both cases, i.e. hardness variation & compositional variation, to sort copper and aluminum alloys. To make sure the variation being examined is the right one, careful attention must be paid to it.
For instance, when an aluminum alloy’s conductivity changes, it usually happens as a result of a change in the alloy’s composition or hardness. Because eddy current fields permeate below the surface of the components, this particular method provides a better classification of the properties that a material holds than any other method used to sort materials.
Weld Testing
Toe cracks in ferrous welds have long been detected using high-frequency eddy current testers. This method has the advantage of being able to detect cracks through multiple layers of paint. One of the drawbacks of this method is the high noise levels that result from permeability changes in the weld.
Crack Detection
There are two types of eddy current testing equipment for locating cracks. Low-frequency equipment is used to inspect subsurface cracks in non-ferrous components, and high-frequency equipment is used to find surface-breaking cracks in non-ferrous and ferrous components. Only when the materials are magnetically saturated to remove permeability impacts is it possible to detect subsurface cracks in ferrous materials. Automated tube testing systems can complete this challenging procedure.
Eddy currents are too sensitive to be used in the surface crack detection process. While high frequencies of the order of 2MHz offer high resolution, the probes are too small, and it takes a long time to cover a large surface area. For low-frequency crack detectors, large probes are necessary to enable good coil inductances.
The frequency setting, which must be in the range of 10 Hz to 100 Hz depending on the required depth of penetration, is crucial. Phase sensing circuits are required because phase changes have a greater impact on subsurface eddy current fields than amplitude changes do.
Measurement Of The Coating Thickness
The outstanding surface resolution of eddy current testing makes it highly useful in measuring the thickness of the coatings, whether it is metallic or paint, on the components meticulously.
Tube And Wire Testing
Bar, tube, and wire are examined at a speed of 3 m/s using automated eddy current test systems. The implemented test runs automatically, removing defective parts from the production line or marking them with paint after the operator calibrates the apparatus using a wire or tube with known flaws. Due to the complicated mechanical handling equipment for the test pieces, the actual eddy current test instrumentation may seem like a minor component.
The facilities needed for magnetic saturation and the demagnetization of ferrous wires and tubes result in an increase in capital costs. Continuous test speeds and differential coils allow for fast test signal modulation, which is followed by noise-removal filters. But regrettably, when differential coils are used, it is possible for tubes—which have consistent flaws along their entire length—to pass through the eddy current system undetected.
Additionally, the tube ends cannot be distinguished because of the edge effects. Furthermore, the eddy current field from an encircling coil remains at zero intensity at the center of a strong cylinder, making it impossible to detect the extrusion flaws along the center of the bars.
FAQ
How Often Should Eddy Current Testing Be Carried Out?
Every three to five years, Eddy Current Testing should be done. If there is system damage that needs to be monitored and is currently occurring, the test should be run more frequently. In order to reduce downtime, testing is best done during an annual inspection.
It’s wise to regularly check and maintain the condition of your tubing. Regularly checking for pressure changes and changes in your fluid flow rates will help you spot issues early, when they are still relatively simple to fix.
What Are The Limitations Of Eddy Current Testing (ECT)?
In terms of depth of penetration, ECT has known limitations. In general, ECT is most effective when used to inspect thin materials or materials where potential flaws could be found on or close to the surface.
Although there are techniques and coil/probe configurations that can be used to deal with this, circumferential cracks are extremely challenging to assess due to the nature of how Eddy Currents themselves operate.
What Can Eddy Current Testing (ECT) Detect?
A circumferential crack, a small volume crack, pitting, and corrosion can all be found using ECT.
Final Thoughts
Eddy current inspection uses electromagnetic induction to find and characterize surface and sub-surface defects in conductive materials. It is a highly sensitive form of testing for small surface defects, providing immediate results.
At Valence, we take care in ensuring your parts are flawless. We offer a range of inspection services, including NDT as a standalone service, as well as all pre- and post-NDT finishing services.
With multiple in-house level 3 certified technicians, we expertly process everything from small parts to large structural parts up to 30.’ Our technicians complete exceptional training and exceed standards throughout the entire production process.
We offer extensive maintenance and fracture critical approvals for all major primes, including Boeing, Airbus, and many more. We hold AS9100 Nadcap approval as well as unique approvals for NASA, United Launch Alliance, and many more.
At Valence, we understand the importance of meeting industry requirements. We are committed to quality assurance in all of the products we produce. Ask us about our on-location NDT services, including FPI and eddy current!
Nondestructive Testing News
Valence Surface Technologies Adds Nondestructive Testing (NDT) Capabilities in Southern California
GARDEN GROVE, CA MARCH 21, 2022 Valence Garden Grove Operations (formerly known as Coastline Metal Finishing) has completed the installation and commissioning of their new Nondestructive testing (NDT) line. The new line, along with inspection personnel, has passed...
