Fluorescent Penetrant Inspection
Fluorescent penetrant inspection is a non-destructive testing method prized for its sensitivity and ability to identify surface-breaking flaws. By applying a special fluorescent dye to the surface of a component, inspectors at Valence can reveal any cracks or voids. This inspection is vital in aerospace, where even the smallest defect could have critical implications.
The Process Of Fluorescent Penetrant Inspection
Step 1: Pre-Inspection Cleaning
The initial step in fluorescent penetrant inspection involves meticulous cleaning of the component’s surface. This cleaning is crucial as any residual dirt, grease, or contaminants can hinder the penetrant’s ability to seep into flaws. Various methods, such as solvent cleaning, vapor degreasing, or alkaline cleaning, may be used depending on the material and the nature of the contaminants.
Step 2: Application Of Penetrant
After cleaning, a fluorescent dye penetrant is evenly applied to the surface. This dye is specially formulated to penetrate into the tiniest of cracks or voids through capillary action. The application can be done through spraying, brushing, or immersing the component in the penetrant, ensuring thorough coverage.
Step 3: Excess Penetrant Removal
Once the penetrant has had enough time to settle (dwell time), the excess is removed from the surface. This step is critical. It needs to be done carefully to avoid washing out the penetrant from the defects. Techniques like water washing, non-aqueous wet developer application, or dry removal are chosen based on the type of penetrant used.
Step 4: Developer Application
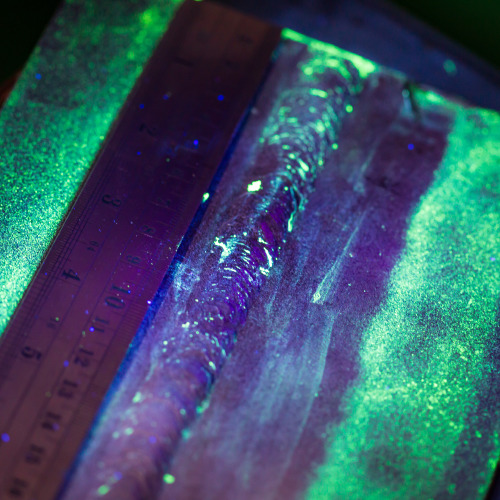
Next, a developer is applied, which acts like a blotter. It draws the penetrant out of the flaws and onto the surface, creating a visible indication of the defect. The developer, usually a white powder, forms a contrasting background that aids in identifying the fluorescent indications under UV light.
Step 5: Inspection Under UV Light
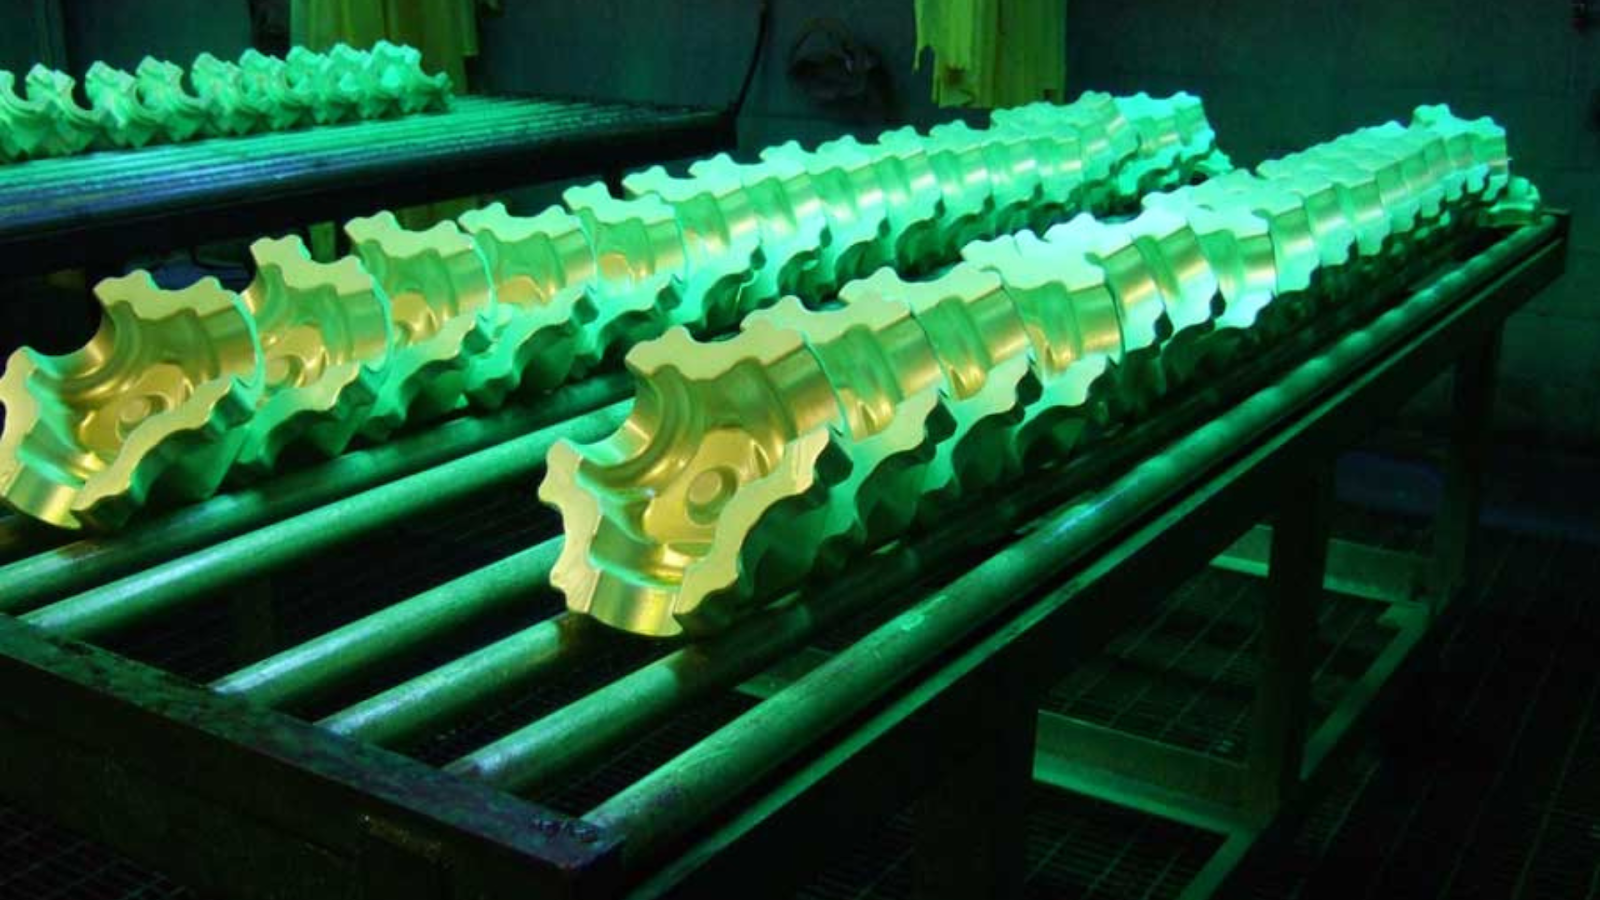
The most critical phase of the inspection occurs under ultraviolet light, usually in a darkened environment. The fluorescent dye within the defects will emit a bright glow when exposed to the UV light, clearly indicating the presence and location of surface flaws. This stage requires skilled technicians to interpret the indications accurately.
Step 6: Post-Inspection Cleaning
The final step involves thoroughly cleaning the component to remove all traces of the penetrant and developer. This is essential to prevent any residue that might interfere with further processing or the performance of the component. The cleaning method depends on the penetrant system used and the component’s subsequent use.
Applications: Where And How Fluorescent Penetrant Inspection Is Used
Fluorescent Penetrant Inspection (FPI) finds its application in a wide range of industries, highlighting its versatility and importance in quality assurance and safety. Here are some key sectors where FPI plays a critical role:
Aerospace Industry
FPI is extensively used to inspect aircraft components, including engine parts, landing gear, and airframes, for surface cracks and defects. Even the smallest flaw can be catastrophic, making FPI crucial for ensuring the safety and reliability of aircraft.
Automotive Industry
The automotive industry relies on FPI to inspect critical components like engine blocks, axles, gears, and suspension systems. These inspections ensure that the parts can withstand the stresses of operation without failure, thereby guaranteeing the safety and performance of vehicles.
Manufacturing And Metalworking
In general manufacturing and metalworking, FPI is used to inspect welds, castings, and machined parts. It ensures the structural integrity of components used in various machinery and equipment, contributing to their durability and reliability.
Energy Sector
In the energy industry, particularly in oil and gas, FPI is used to inspect pipelines, valves, and other equipment for surface flaws. This is crucial for preventing leaks and ensuring the safe operation of facilities, especially in high-pressure environments.
Medical Device Manufacturing
FPI is also vital in the medical sector for inspecting surgical instruments and implants. The method ensures that these critical devices are free of defects, which is essential for patient safety and the success of medical procedures.
Benefits Of Choosing Fluorescent Penetrant Inspection For Surface Finishing
Fluorescent penetrant inspection offers several significant advantages, making it a preferred method for surface finishing inspections in various industries. Here are some key benefits:
High Sensitivity To Surface Defects
One of the primary advantages of FPI is its high sensitivity to small surface defects. The fluorescent dye can reveal cracks, porosity, laps, seams, and other discontinuities that might be invisible to the naked eye. This sensitivity is crucial for detecting potential failure points in critical components.
Applicability To A Wide Range Of Materials
FPI is versatile and can be applied to a variety of non-porous materials, including metals, plastics, ceramics, and certain types of glass. This wide applicability makes it an invaluable tool in industries that utilize diverse materials in their products.
Cost-Effective And Time-Efficient
Compared to other non-destructive testing methods, FPI is relatively cost-effective and quick. The process does not require expensive equipment or extensive training, making it accessible for many companies. Additionally, the inspection and result interpretation are fast, allowing for the rapid processing of a large number of components.
Ease Of Interpretation
The fluorescent indications of defects are easy to see under UV light, simplifying the interpretation process. This visual clarity aids inspectors in quickly identifying and assessing defects, which is essential for maintaining high-quality standards and efficient production processes.
Non-Destructive And Safe
FPI is a non-destructive testing method, meaning it doesn’t damage or alter the parts being inspected. This aspect is particularly important for expensive or critical components. Moreover, with proper safety measures, the use of fluorescent dyes and UV light can be managed safely, posing minimal risk to operators.
Enhances Product Reliability And Safety
By identifying surface defects early in the manufacturing process, FPI helps enhance the overall reliability and safety of the final product. This quality assurance is critical in industries where component failure can have severe consequences, such as in aerospace or automotive manufacturing.
Valence’s Commitment To Quality With Fluorescent Penetrant Inspections
Our dedication to quality is central to what we offer, with FPI leading our pursuit of excellence.
No Compromises On Standard
Valence views industry standards not as boundaries but as starting points for further development. Valence sets and rigorously follows its own high standards, exceeding usual norms to ensure the quality delivered is not just satisfactory but outstanding. This philosophy defines our approach to FPI, where every detail matters, and no standard is too high to achieve.
Over 4,500 Unique Approvals
Our dedication to excellence in FPI is demonstrated by obtaining over 4,500 unique approvals, highlighting our extensive expertise and strong capabilities. This large number of approvals from different regulatory agencies emphasizes our history of quality and reliability. This is a clear sign of Valence’s strong commitment to not only meet but also surpass the varied and strict needs of our clients and their industries.
Frequently Asked Questions
Why is pre-cleaning essential in FPI?
Pre-cleaning ensures the complete removal of contaminants that might obstruct the penetrant’s path. This step is crucial for the reliability of the inspection.
What role does the developer play in FPI?
The developer acts as a film, pulling the fluorescent penetrant to the surface to form visible indications of defects that might otherwise be subtle or invisible.
What differentiates Valence’s FPI from others in terms of quality assurance?
Valence maintains strict adherence to protocols, offers end-to-end inspection solutions, and pursues continuous improvement to ensure superior quality.
Why does Valence prioritize FPI among its service offerings?
FPI is chosen for its unique sensitivity and unmatched ability to detect defects that other methods might miss, aligning with Valence’s commitment to safety and integrity.
How does Valence contribute to elevating aerospace finishing standards?
Valence integrates FPI into a comprehensive surface treatment process, ensuring each step enhances the next to achieve unparalleled quality and efficiency.
How does Valence’s FPI approach align with its dedication to perfection?
FPI at Valence signifies their unwavering commitment to quality, innovation, and safety, embodying their pursuit of perfection.
What future-ready solutions does Valence offer to adapt to the dynamic aerospace industry?
Valence’s services are not only current but also designed to address emerging challenges, offering adaptable solutions.
Why is the removal of excess penetrant a crucial phase in FPI?
Proper removal of any excess penetrant ensures the clarity of defect indications, avoiding misleading or false results during inspection.
What makes FPI a preferred method in the aerospace sector compared to other inspection techniques?
FPI’s sensitivity to minute surface flaws, coupled with its non-destructive nature, makes it highly effective and widely used in aerospace.
Can FPI identify defects in complex and intricate aerospace components?
Yes, FPI’s capillary action enables it to detect flaws even in intricate and hard-to-reach areas of aerospace parts.
Nondestructive Testing Services
Conductivity Inspection
Conductivity inspection measures the electrical conductivity of a metal part or component. This is an in process test of chemical processing to verify the integrity and consistency of a chemical processing operation.
Hardness Testing
Hardness testing verifies the hardness of the base material, and can be used to validate that previous processes have been performed correctly. All Valence products are guaranteed to meet specified standards.
FPI (Fluorescent or Liquid Penetrant Inspection)
Fluorescent penetrant inspection is a type of dye penetrant inspection where a non-permanent fluorescent dye is applied to a non-porous part to detect cracks and defects that are invisible on sight inspection. This type of inspection is a highly efficient method to testing parts.
Magnetic Particle Inspection
Magnetic particle inspection detects surface and shallow subsurface discontinuities in ferromagnetic materials. This inspection can give immediate data and reveal errors or defects. It will prevent future leaks and other flaws.
Eddy Current Testing
Eddy current inspection uses electromagnetic induction to find and characterize surface and sub-surface defects in conductive materials. It is a highly sensitive form of testing for small surface defects, providing immediate results.
Copper Sulfate Testing
Copper sulfate testing verifies the effectiveness of, or need for passivation on a stainless steel part. This test is proficient in advanced aerospace applications.
Boroscope Inspection
Boroscope inspection allows the internal surfaces of geometrically complex components to be visually inspected for surface finish integrity. The inspection can prevent small issues in materials that potentially lead to huge losses in the long-term.
Valence performs all of these services to the highest degree of care, with approvals for most prime and military specifications. Our products and services significantly enhance safety, long-term use, and consistency in the aerospace industry. View our specs here.
NDT Capability Sizes
| Valence Eastman | L | Valence Wichita | L | Valence Grove | L | Valence Garden Grove | L | Valence Los Angeles | L | Valence Seattle | L | Valence Everett | L |
|---|---|---|---|---|---|---|---|---|---|---|---|---|---|
| Eddy Current | No Limit | Hardness/Conductivity | No limit | Hardness/Conductivity | No limit | Abrasive Blast | 5' | Hardness/Conductivity | No limit | Hardness/Conductivity | No limit | Hardness/Conductivity | No limit |
| Hardness/Conductivity | No limit | Magnetic Particle Big | 6' | Penetrant | 24' | Glass Bead | 3' | Penetrant | 27' | Magnetic Particle | 4.5' | Penetrant | 30' |
| Magnetic Particle | 4.5' | Penetrant | 13' | Laser Part Mark | 4' | Penetrant | 6' | ||||||
| Penetrant | 20' | Stress Relieve Bake | 3' | ||||||||||
| Ultra Sonic Cleaning | 4' |
Nondestructive Testing News
Valence Surface Technologies Adds Nondestructive Testing (NDT) Capabilities in Southern California
GARDEN GROVE, CA MARCH 21, 2022 Valence Garden Grove Operations (formerly known as Coastline Metal Finishing) has completed the installation and commissioning of their new Nondestructive testing (NDT) line. The new line, along with inspection personnel, has passed...
