Magnetic Particle Inspection Services
In today’s high-stakes industry environments, the integrity of components is not just about maintaining functionality—it’s about ensuring safety and longevity. Magnetic Particle Inspection (MPI) is an invaluable tool for achieving this, allowing technicians to uncover flaws that could compromise the structural integrity of a component. Valence Surface Technologies, with its unwavering dedication to excellence and safety, provides MPI services that businesses rely on to maintain the highest standards in quality control.
Discover Magnetic Particle Inspection services that redefine industry standards for safety, reliability, and accuracy. Valence Surface Tech is your gateway to unparalleled results.
What Is Magnetic Particle Inspection?
Magnetic particle inspection is a non-destructive testing process that uses magnetic fields and small magnetic particles to detect surface and slight subsurface flaws in ferromagnetic materials.
This method is sensitive and can reveal hairline fractures, porosity, seams, inclusions, and other discontinuities that might be invisible to the naked eye. Valence offers MPI services that help customers ensure that their critical components are free from defects that could lead to failure.
Principles Of Magnetic Particle Inspection
The fundamental principle behind MPI involves the creation of a magnetic field in a ferromagnetic material. When the material has a discontinuity, such as a crack, the magnetic field is altered, creating leakage at the flaw’s location.
Fine magnetic particles applied to the surface are attracted to these areas of flux leakage, allowing for visible detection under proper lighting conditions. Valence’s technicians leverage this principle to deliver precise and trusted testing results.
Types Of Magnetic Particle Inspection Techniques
Valence offers a broad array of MPI techniques to suit diverse needs:
Continuous Method
Designed to streamline the MPI process, the Continuous Method involves magnetizing the components and continuously applying magnetic particles during the process. This technique is especially effective in environments where the speed of inspection is of the essence.
It is often the go-to choice in production lines or for bulk inspections where time is at a premium. Automated systems using this method can inspect large volumes of components, thus enhancing throughput while maintaining consistency in coverage and detection.
Residual Method
Some materials possess the characteristic of retaining a degree of magnetism after the initial magnetic field has been removed. The Residual Method exploits this property by allowing inspections to occur even when the component is no longer within a magnetic field.
The advantage here is significant as it enables the inspection of sections that are hard to reach or should be inspected away from the magnetizing equipment. It also allows for a certain level of post-process reassembly where parts can be tested as part of a larger structure without the need for repowering the magnetizing equipment.
Bench Inspection
For detailed and more controlled inspections, Valence employs the Bench Inspection technique. This method uses stationary units that can generate stronger and more uniform magnetic fields, which is crucial for detecting very fine or subtle surface and subsurface disruptions.
Components are usually brought to a dedicated MPI facility where advanced equipment, such as fixed benches with adjustable coils and specialized lighting, is used. The bench units also often incorporate demagnetization capabilities, allowing for a complete inspection cycle. Given the controlled environment, the Bench Inspection method allows for a high degree of precision and is favored for critical analyses where attention to minute detail is required.
Field Inspection
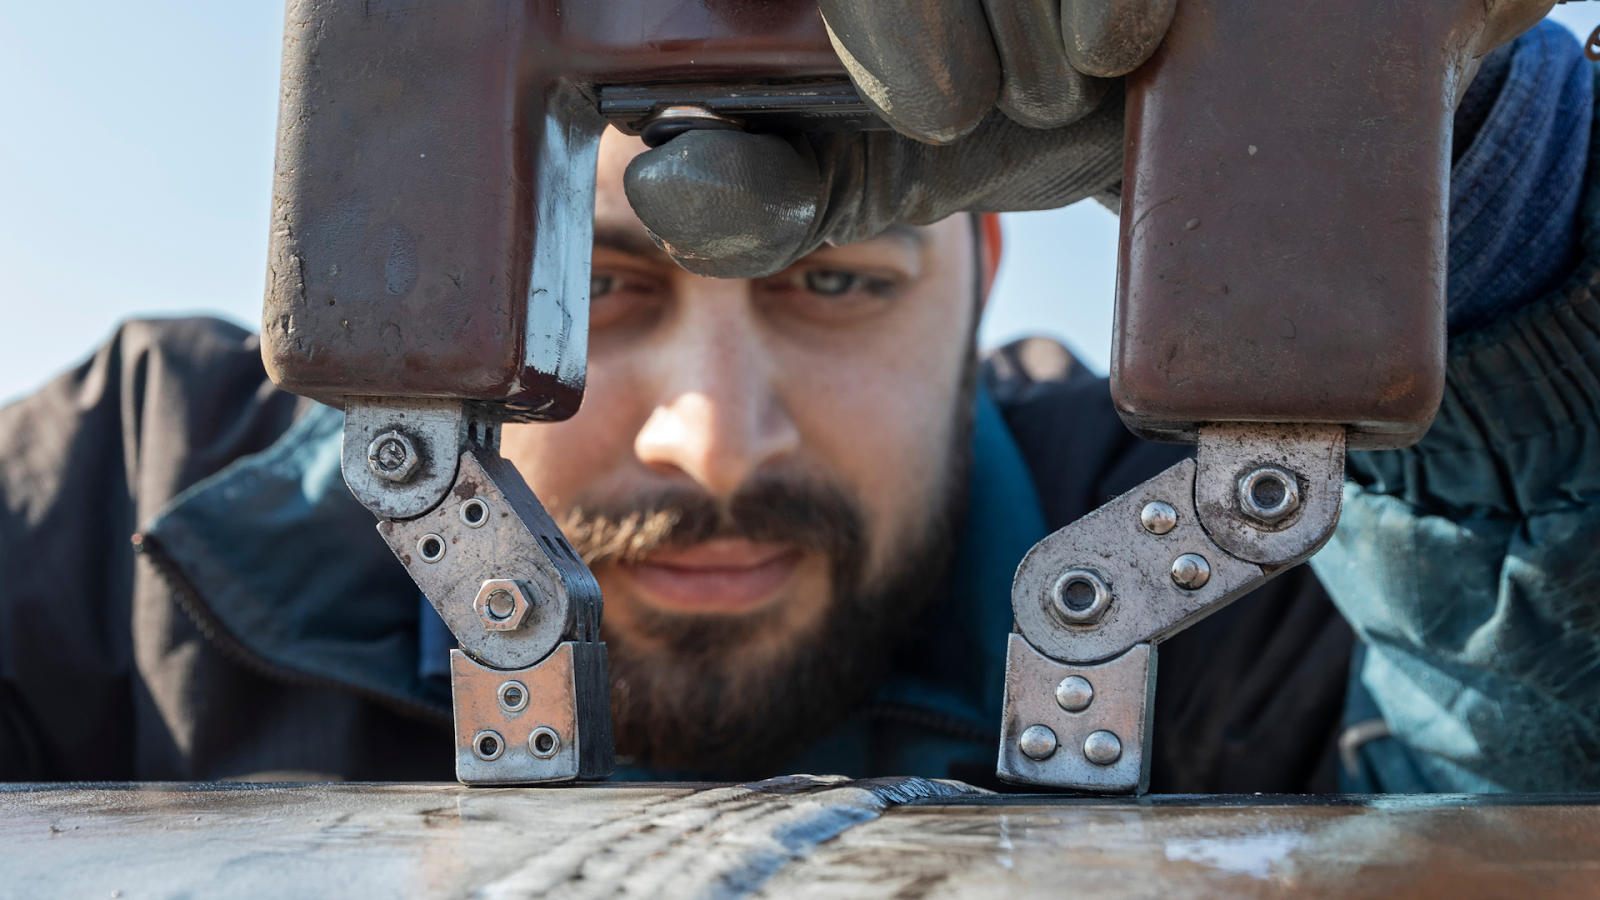
When the need for MPI extends beyond the reach of a lab or workshop, Valence’s Field Inspection service is unmatched. With the mobility of advanced portable inspection units, technicians can perform MPI on components that are too large or unwieldy to be moved.
Infrastructure projects, in-field aviation assessments, and on-site energy generation equipment are typical situations where the Field Inspection capability shines. By bringing the necessary technology to the point of use, Valence ensures that no matter the inspection context, every client receives the highest standard of service performance.
Step-By-Step Process Of Conducting Magnetic Particle Inspection
The process of MPI is methodical and includes several critical steps:
Preparation
The inspection begins with rigorous preparation because the success of MPI hinges on the cleanliness of the component’s surface. Each part undergoes a thorough cleaning regimen to strip away any dirt, grease, oil, or paint that could mask surface discontinuities. The use of solvents, degreasers, or abrasive methods is tailored to the nature of the contaminant and the material of the component. It’s imperative that no residues are left behind, as this could lead to false indications or obscure real defects.
Valence Surface Tech ensures that the Magnetic Particle Inspection process is not only thorough but also replicable and consistent, providing clients with assured quality and service integrity.
Magnetization
The essence of MPI lies in the proper application of the magnetic field. Two primary magnetization techniques are utilized—direct and indirect. Direct magnetization passes an electrical current directly through the component, generating a magnetic field; this is particularly suitable for components with simple geometry.
Indirect magnetization, on the other hand, uses an external magnet or a current passing through a coil or yoke to induce the field, preferred for complex shapes. Valence meticulously selects the most suitable method based on the part’s properties, ensuring optimal flux distribution.
Application Of Particles
Once the component is magnetized, fine magnetic particles—either in dry form or suspended in a liquid carrier—are applied to the surface. The method of application is as vital as the inspection itself. Particles must cover the component evenly, without forming clumps that could impede the inspection. In the case of wet particle inspection, the suspension’s concentration and viscosity are carefully controlled to create a smooth, flowing coating that will sensitively respond to flux leakage.
Inspection
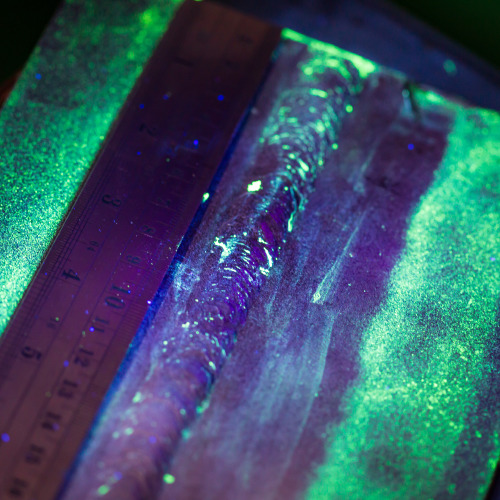
After the application of the magnetic particles, intense scrutiny follows. The inspectors at Valence utilize a variety of lighting conditions, from bright white light to UV light, which causes fluorescent particles to glow vividly. This step requires an extremely vigilant and systematic examination to identify the telltale signs of particle cluster formations. The interpretations are subject to stringent norms, with inspectors trained to distinguish between true indications and nonrelevant indications.
Demagnetization
Inspection is followed by demagnetization, which is as critical as the inspection itself. Parts must be returned to a non-magnetic state to prevent issues in further processing or final operation. The demagnetization process involves reducing the magnetic field gradually to zero, thereby eliminating residual magnetism. This step is performed with the utmost care, ensuring parts will not retain any magnetic field that could attract ferrous particles and potentially compromise their function or safety.
Documentation
The culmination of the MPI process is comprehensive documentation. This phase includes detailing the inspection results, recording any findings of discontinuities, and cataloging parts that have passed the MPI scrutiny. Documentation can range from traditional written reports to digitized records, including photographs or videos of the inspection process for traceability and future reference. This completeness allows Valence to maintain a robust quality assurance system and provides clients with accessible and verifiable inspection data.
Common Applications Of Magnetic Particle Inspection
MPI is utilized across a wide range of industries, including aerospace, automotive, oil and gas, and infrastructure. It is particularly useful for inspecting critical components, such as landing gear, engine parts, pipelines, and construction beams. Valence’s extensive experience across industries means that their MPI services are tailored to meet specific regulatory and safety standards.
Advantages Of Using Magnetic Particle Inspection
Valence’s MPI offers substantial advantages:
Detective Precision
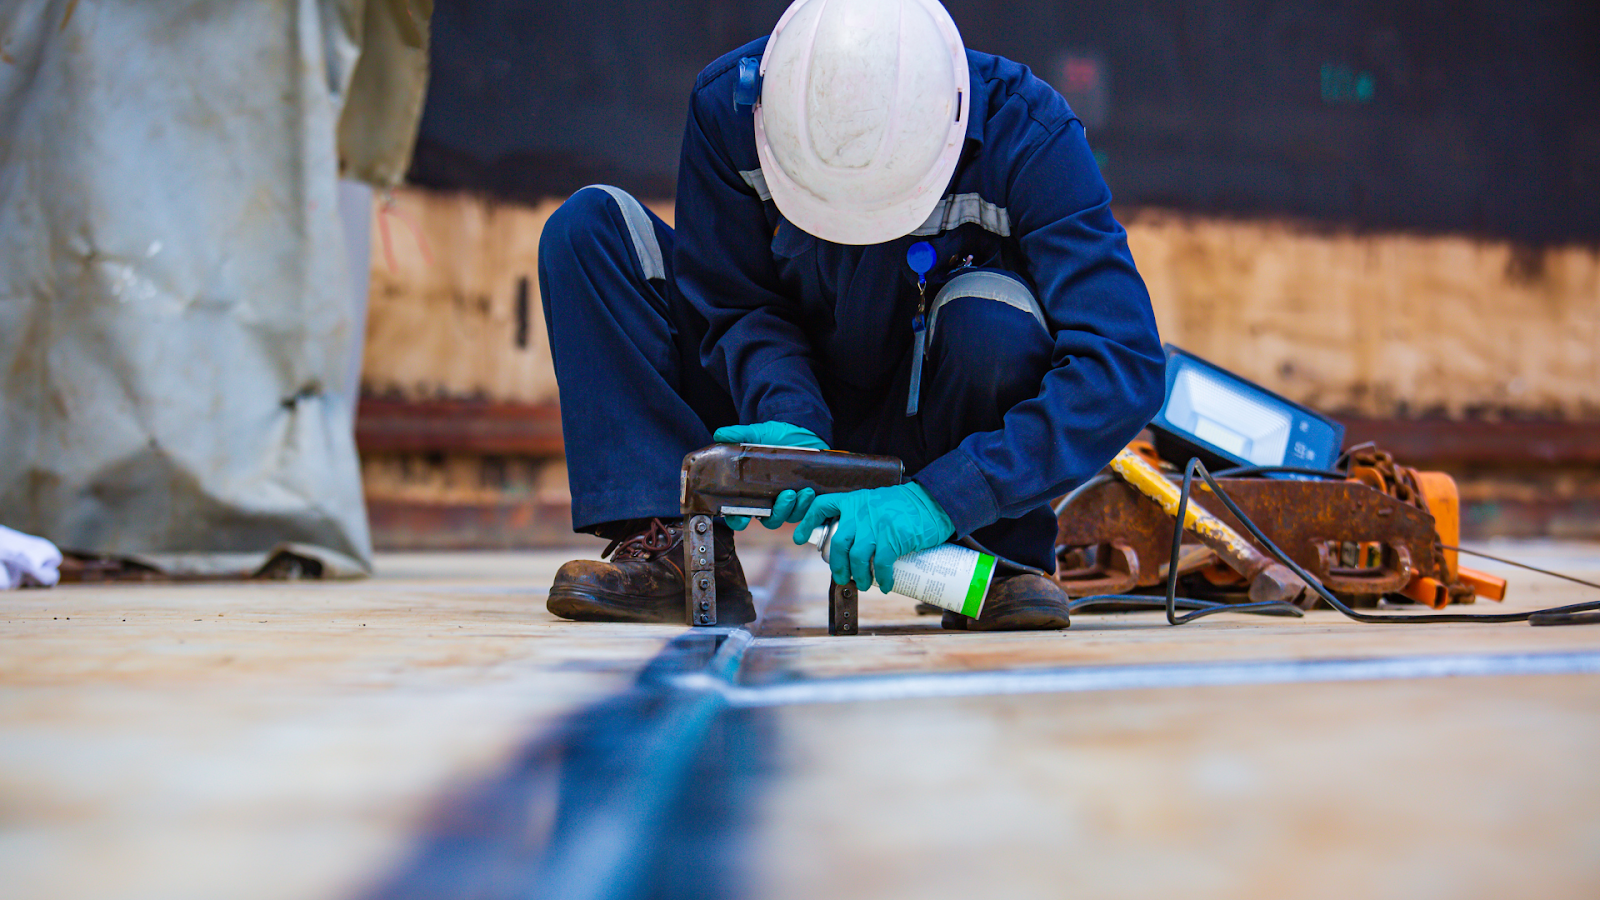
MPI is renowned for its remarkable ability to detect a wide range of defects with incredible precision. Valence’s MPI methodology goes beyond just identifying obvious flaws; it uncovers the finest, most subtle indications of surface and slightly subsurface discontinuities within the material.
The high resolution of this technique makes it the preferred choice for detecting critical defects that other methods might overlook, such as minute cracks, slightly misaligned welds, and early-stage corrosion. Valence’s acute focus on detail ensures that anomalies are identified early, preventing costly failures and prolonging the life cycle of the components.
Efficiency In Application
One of the most significant attributes of MPI is the rapidity with which it can be applied, and with Valence’s refined processes, clients benefit from turnarounds that are swift yet never compromise on meticulousness.
Speedy application processes enable Valence to conduct a high volume of inspections within a short timeframe, providing crucial savings in both time and resources for clients. This efficiency is particularly advantageous in fast-paced environments where downtime is critical, such as in aerospace maintenance, automotive assembly lines, and energy production facilities.
Comprehensive Coverage
Valence’s state-of-the-art MPI services are versatile enough to accommodate a vast array of component geometries, sizes, and complexities. Whether the part in question is a small bolt or a large turbine rotor, Valence has the capability to adapt the inspection to the needs of the component. The magnetic particles used in the procedure can conform to irregular surfaces, coat intricately shaped objects, and reach recessed areas, ensuring an all-inclusive inspection without the risk of oversight.
Non-Destructive Assurance
The integrity of a part post-MPI is absolutely guaranteed, as the technique is inherently non-invasive. Clients can rest assured that their components will retain their original form, strength, and utility after the inspection. This characteristic is especially vital for parts that are integral to safety-critical systems, where alteration or weakening of the component is unacceptable. Valence’s commitment to non-destructive solutions upholds the functional and structural integrity of parts, allowing them to seamlessly re-enter service.
Economical Operation
Valence’s MPI process is optimized for the economy without compromising quality. The minimal need for elaborate surface preparation and the minimal consumption of consumables contribute to a cost-effective approach. Additionally, the expeditious nature of the process diminishes the need for extended labor hours, saving on operational costs.
This cost efficiency is passed on to clients, delivering exceptional value for an indispensable service. Combined with the potential cost savings derived from preemptive flaw detection and the avoidance of catastrophic failures, MPI emerges as an economically wise choice for quality assurance protocols.
Safety Considerations In Magnetic Particle Inspection
Adhering to rigorous safety protocols, Valence’s MPI operations mitigate the risks associated with magnetic fields and inspection materials. Technicians receive comprehensive training and are equipped with the necessary PPE, while facilities are designed with advanced ventilation systems, ensuring a secure and responsible inspection environment.
Future Trends In Magnetic Particle Inspection Technology
The future of MPI at Valence is bright, with innovation centered on advanced automation, augmented reality (AR) for improved defect visualization, and integrated systems for real-time data analysis and record-keeping. These advancements, combined with a culture steeped in continuous improvement and client partnership, position Valence at the vanguard of MPI service providers, primed to meet the challenges of today’s industries and beyond.
Final Thoughts On Magnetic Particle Inspection
Valence Surface Tech’s Magnetic Particle Inspection (MPI) is crucial in aerospace, defense, and automotive industries for ensuring component integrity. Our process involves meticulous preparation and advanced inspection methodologies, highlighting our commitment to precision. We understand the responsibility of inspecting materials critical to people’s safety.
Our expert team uses the latest technology for thorough, non-destructive inspections. Our MPI service is adaptable to various shapes and sizes, ensuring efficient and detailed flaw detection. This approach offers fast turnaround times and cost-effective solutions, maintaining high quality and safety standards.
Explore top-tier Magnetic Particle Inspection Services from Valence Surface Tech, designed for industries demanding precision & safety. Detecting defects & ensuring component integrity with our expert non-destructive testing. Contact us for unparalleled MPI solutions.
Frequently Asked Questions About Magnetic Particle Inspection
What is magnetic particle inspection (MPI)?
Magnetic particle inspection (MPI) is a nondestructive testing (NDT) method used to detect surface and near-surface discontinuities in ferromagnetic materials. Ferromagnetic materials include iron, nickel, cobalt, and some of their alloys.
MPI is based on the principle that magnetic fields will concentrate at discontinuities in a magnetized material. These discontinuities can then be detected by applying magnetic particles to the surface of the material. MPI is a versatile and widely used NDT method that is relatively inexpensive and easy to perform.
How does magnetic particle inspection work?
The basic steps of MPI are as follows:
Cleaning: The surface of the material to be inspected is cleaned to remove any dirt, grease, or other contaminants that could interfere with the inspection.
Magnetization: The material is magnetized using a magnetic field. The type of magnetization depends on the type of material and the type of discontinuity being detected.
Application of magnetic particles: Magnetic particles are applied to the surface of the material. The particles are attracted to magnetic fields and will concentrate at any discontinuities in the material.
Inspection: The surface of the material is inspected under ultraviolet light or bright white light to detect any indications, which are the patterns formed by the magnetic particles.
Demagnetization: The material is demagnetized to remove any residual magnetism. This is important to prevent the material from attracting unwanted magnetic particles.
What types of defects can MPI detect?
MPI can detect a variety of surface and near-surface discontinuities, including:
- Cracks
- Fatigue cracks
- Porosity
- Slag inclusions
- Weld defects
What are the benefits of using MPI?
MPI has a number of benefits, including:
- It is a versatile method that can detect a variety of defects.
- It is relatively inexpensive and easy to perform.
- It is a portable method that can be used in a variety of environments.
- It can be used to inspect a variety of ferromagnetic materials.
What are the limitations of MPI?
MPI has some limitations, including:
- It cannot detect defects that are deep below the surface of the material.
- It cannot be used to inspect non-ferromagnetic materials.
- It is not always effective in detecting defects that are oriented parallel to the magnetic field.
What are the different types of MPI?
There are two main types of MPI:
- Dry powder MPI: In dry powder MPI, magnetic particles are applied to the surface of the material in a dry powder form.
- Wet fluorescent MPI: In wet fluorescent MPI, magnetic particles are suspended in a liquid carrier and applied to the surface of the material. The particles are fluorescent and glow under ultraviolet light, which makes them easier to see.
What are the standards for MPI?
There are a number of standards that govern the performance of MPI, including:
- ASTM E1444: Standard Practice for Magnetic Particle Examination of Ferrous Castings
- ASTM E709: Standard Guide for Magnetic Particle Examination of Steel Forgings
Who needs to perform MPI?
MPI should be performed by qualified personnel who have been trained in the method. The level of training required depends on the complexity of the inspection.
How much does MPI cost?
The cost of MPI varies depending on a number of factors, including the size and complexity of the material being inspected, the type of MPI being used, and the experience of the inspector.
How is MPI used in the aerospace industry?
MPI is used in the aerospace industry to inspect a variety of components, including aircraft wings, fuselages, and landing gear. MPI is used to detect cracks, fatigue cracks, and other discontinuities that could compromise the safety of the aircraft.
Sources:
- American Society for Testing and Materials International (2016). Standard practice for magnetic particle examination of ferrous castings (ASTM E1444-16). ASTM International. https://www.ledphotometer.com/wp-content/uploads/2019/07/ASTM-E1444-05-Standard-Free-Download.pdf
- American Society for Testing and Materials International (2015). Standard guide for magnetic particle examination of steel forgings (ASTM E709-15). ASTM International. https://www.astm.org/e0709-21.html
- British Standards Institution (2011). Code of practice for magnetic particle inspection (BS EN 13111:2011). BSI British Standards. https://knowledge.bsigroup.com/products/leak-detection-systems-general-principles/tracked-changes
- Canadian Standards Association (2012). Non-destructive testing – Magnetic particle inspection (CSA NDT 2-2012). CSA Group. https://www.csagroup.org/wp-content/uploads/HazardousLocationsProducts23.pdf
- International Organization for Standardization (2009). Non-destructive testing – Magnetic particle inspection – Part 1: General principles (ISO 11604-1:2009). ISO. https://www.academia.edu/29597451/Standard_Guide_for_Magnetic_Particle_Testing_1
- International Organization for Standardization (2009). Non-destructive testing – Magnetic particle inspection – Part 2: Surface inspection methods (ISO 11604-2:2009). ISO. https://www.hhpiping.com/codes-and-standards-for-magnetic-particle-inspection.html
- International Organization for Standardization (2009). Non-destructive testing – Magnetic particle inspection – Part 3: Susceptibility testing (ISO 11604-3:2009). ISO. https://english.jsndi.jp/assets/download/iso.pdf
- Jiles, D. C. (2008). Introduction to magnetic particle inspection. NDT.net. https://www.cendt.net/MT_english.html
- Nondestructive Testing Resource Center. (n.d.). Magnetic particle inspection (MPI). NDT Resource Center. https://www.nde-ed.org/NDETechniques/MagParticle/index.xhtml
- Welding Institute. (n.d.). Magnetic particle inspection (MPI). Welding Institute. https://imechinstitute.com/welding-inspection/
Nondestructive Testing Services
Conductivity Inspection
Conductivity inspection measures the electrical conductivity of a metal part or component. This is an in process test of chemical processing to verify the integrity and consistency of a chemical processing operation.
Hardness Testing
Hardness testing verifies the hardness of the base material, and can be used to validate that previous processes have been performed correctly. All Valence products are guaranteed to meet specified standards.
FPI (Fluorescent or Liquid Penetrant Inspection)
Fluorescent penetrant inspection is a type of dye penetrant inspection where a non-permanent fluorescent dye is applied to a non-porous part to detect cracks and defects that are invisible on sight inspection. This type of inspection is a highly efficient method to testing parts.
Magnetic Particle Inspection
Magnetic particle inspection detects surface and shallow subsurface discontinuities in ferromagnetic materials. This inspection can give immediate data and reveal errors or defects. It will prevent future leaks and other flaws.
Eddy Current Testing
Eddy current inspection uses electromagnetic induction to find and characterize surface and sub-surface defects in conductive materials. It is a highly sensitive form of testing for small surface defects, providing immediate results.
Copper Sulfate Testing
Copper sulfate testing verifies the effectiveness of, or need for passivation on a stainless steel part. This test is proficient in advanced aerospace applications.
Boroscope Inspection
Boroscope inspection allows the internal surfaces of geometrically complex components to be visually inspected for surface finish integrity. The inspection can prevent small issues in materials that potentially lead to huge losses in the long-term.
Valence performs all of these services to the highest degree of care, with approvals for most prime, aerospace, and military specifications. Our products and services significantly enhance safety, long-term use, and consistency in the aerospace industry. View our specs here.
NDT Capability Sizes
| Valence Eastman | L | Valence Wichita | L | Valence Grove | L | Valence Garden Grove | L | Valence Los Angeles | L | Valence Seattle | L | Valence Everett | L |
|---|---|---|---|---|---|---|---|---|---|---|---|---|---|
| Eddy Current | No Limit | Hardness/Conductivity | No limit | Hardness/Conductivity | No limit | Abrasive Blast | 5' | Hardness/Conductivity | No limit | Hardness/Conductivity | No limit | Hardness/Conductivity | No limit |
| Hardness/Conductivity | No limit | Magnetic Particle Big | 6' | Penetrant | 24' | Glass Bead | 3' | Penetrant | 27' | Magnetic Particle | 4.5' | Penetrant | 30' |
| Magnetic Particle | 4.5' | Penetrant | 13' | Laser Part Mark | 4' | Penetrant | 6' | ||||||
| Penetrant | 20' | Stress Relieve Bake | 3' | ||||||||||
| Ultra Sonic Cleaning | 4' |
Nondestructive Testing News
Valence Surface Technologies Adds Nondestructive Testing (NDT) Capabilities in Southern California
GARDEN GROVE, CA MARCH 21, 2022 Valence Garden Grove Operations (formerly known as Coastline Metal Finishing) has completed the installation and commissioning of their new Nondestructive testing (NDT) line. The new line, along with inspection personnel, has passed...
